

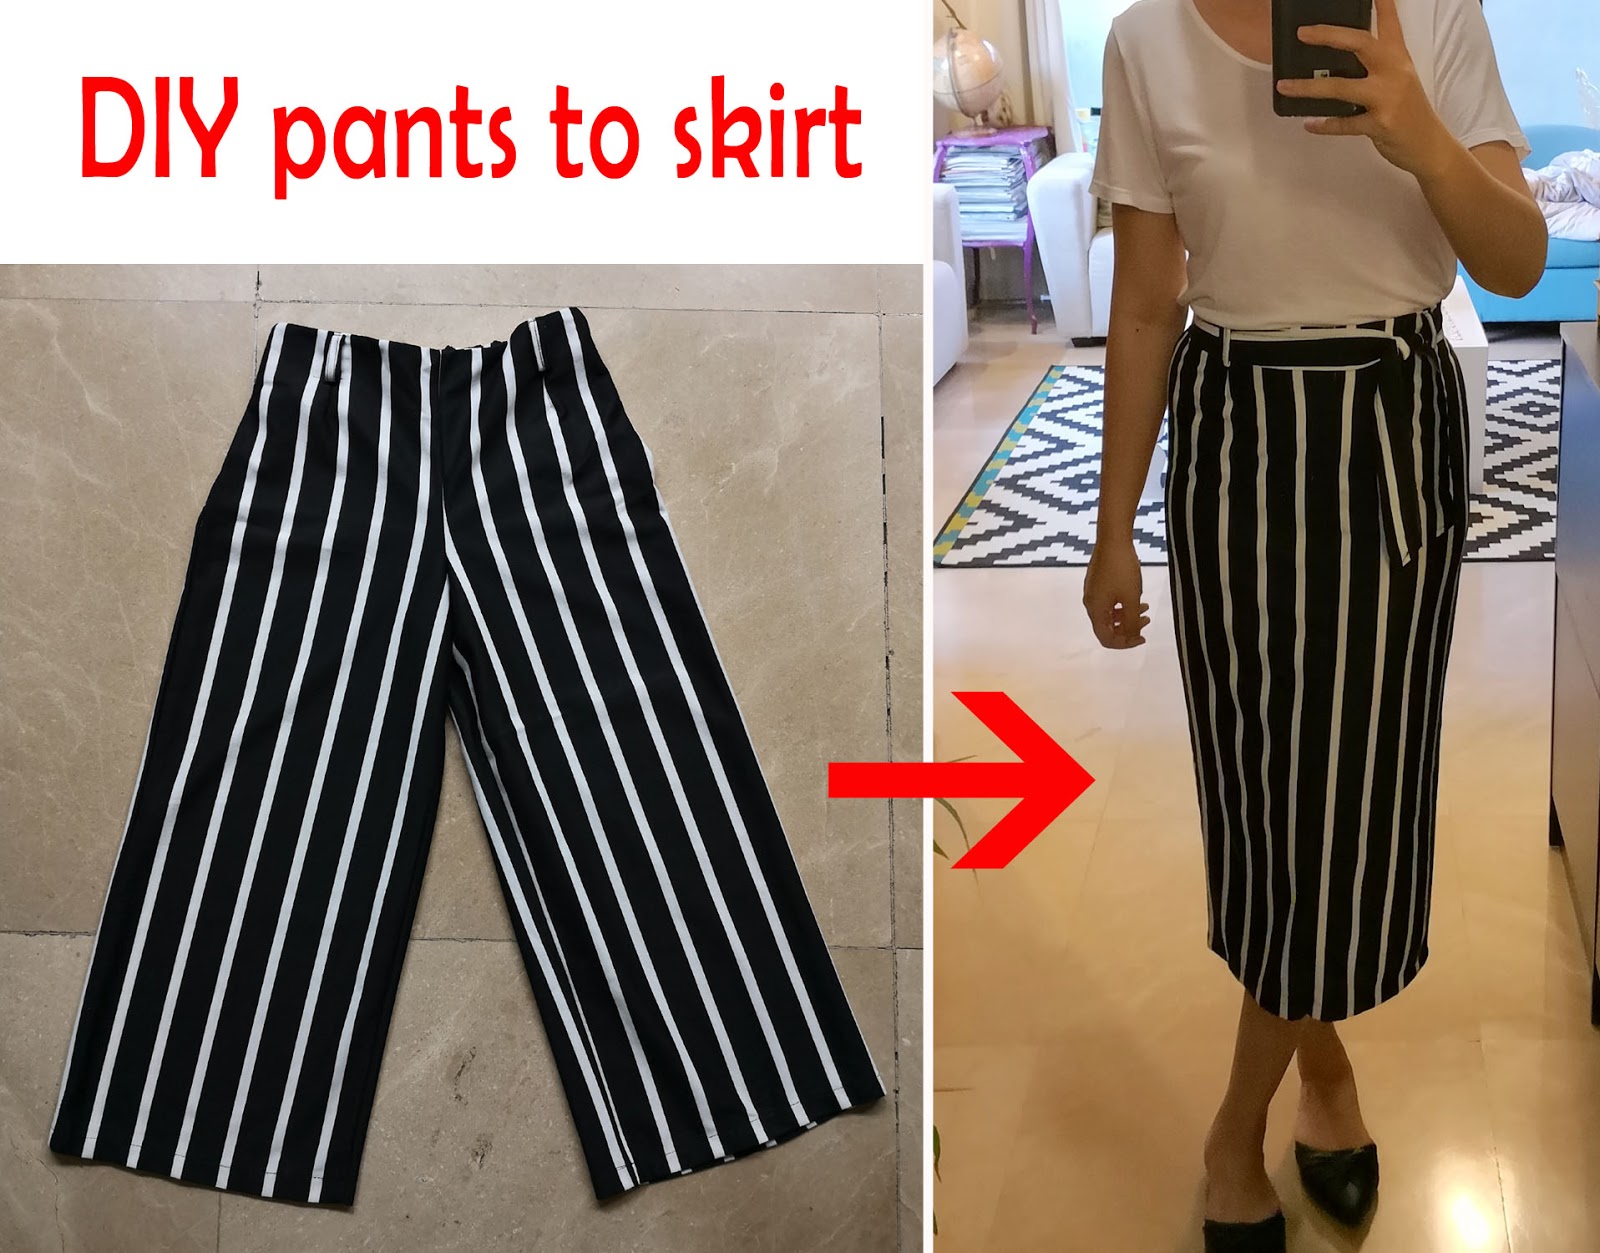
To sew pants into a skirt, cut the pants at the crotch and sew the leg openings together. Adjust the waistband for a better fit.
Transforming pants into a stylish skirt is a creative and eco-friendly fashion project. This DIY task allows you to repurpose old or unworn pants, giving them a new lease on life. It’s a simple process that requires basic sewing skills and minimal materials.
By converting pants into a skirt, you can customize the design to suit your personal style. This project is not only cost-effective but also sustainable, reducing textile waste. Whether you prefer a mini, midi, or maxi skirt, this guide will help you achieve a fashionable and unique piece for your wardrobe.
Credit: mrsmommyholic.blogspot.com
Materials Needed
Creating a skirt from a pair of pants can be a fun and rewarding project. But before you start, you need to gather the right materials. The quality of your finished skirt depends on the materials you choose. Below are the essential items you’ll need.
Fabric Selection
Choosing the right fabric is crucial for a successful project. Here are some tips:
- Denim: Perfect for a casual, sturdy skirt.
- Cotton: Great for a lightweight, breathable option.
- Silk: Ideal for a luxurious, flowing skirt.
Consider the season and occasion when picking your fabric. For a winter skirt, opt for heavier materials like wool. For summer, light fabrics such as linen are ideal.
Tools And Supplies
Having the right tools and supplies will make the sewing process easier. Here’s a list of essential items:
| Tool/Supply | Purpose |
|---|---|
| Sewing Machine | For stitching the fabric pieces together |
| Fabric Scissors | To cut the fabric cleanly |
| Measuring Tape | For accurate measurements |
| Seam Ripper | To remove stitches if needed |
| Pins and Pin Cushion | To hold fabric pieces in place |
| Iron and Ironing Board | For pressing seams and fabric |
Here are some additional supplies that might come in handy:
- Thread: Match the color to your fabric.
- Zipper or Buttons: Depending on your skirt design.
- Chalk or Fabric Marker: For marking measurements on fabric.
With these materials, you’ll be well-prepared to turn your pants into a stylish skirt.
Preparing The Pants
Before you can turn pants into a skirt, preparation is key. Preparing the pants ensures the final skirt looks neat and professional. Follow these steps carefully to get started.
Choosing The Right Pants
Start by choosing the right pants. Look for pants with minimal wear and tear. Avoid pants with holes or stains. The fabric should be sturdy yet soft. Denim or cotton pants work best for this project. Make sure the pants fit your waist well.
Measuring And Marking
Proper measurements are crucial for a well-fitting skirt. Follow these steps:
- Lay the pants flat on a table.
- Measure from the waistband to the desired skirt length.
- Use a fabric marker to draw a line across the pants at this length.
- Measure the width of the pants at the thigh. This helps in creating the skirt’s width.
Ensure your measurements are accurate. Double-check all marks before cutting.
Use a ruler or measuring tape for straight lines. This ensures a clean cut and professional finish.
Once your pants are measured and marked, you are ready for the next step in transforming them into a beautiful skirt.
Cutting The Pants
Sewing pants into a skirt is a fun and creative project. The first step involves cutting the pants. This step sets the foundation for your new skirt. Follow these easy steps to get started.
Removing The Inseam
First, turn your pants inside out. Lay them flat on a table. Use a seam ripper to remove the inseam. This is the seam that runs from the crotch to the bottom of each leg. Carefully rip the stitches, taking care not to tear the fabric. Once removed, you will have two separate legs.
Tip: Keep the seam ripper close to the stitches. This helps avoid unwanted fabric damage.
Creating The Skirt Shape
Next, lay the pants flat with the open legs spread out. Align the front and back pieces. Trim any excess fabric to create a smoother shape. This is where you will form the skirt’s new lines. Use a ruler or measuring tape to ensure even cuts.
You might need to trim the waist area to create a better fit. Mark where you want the new hemline. Use chalk or a fabric marker for clear lines.
Pro Tip: Save any fabric scraps. They can be useful for patches or decorations later.
Now, your pants are ready for the next step in the transformation process. By carefully removing the inseam and shaping the fabric, you set the stage for a stylish new skirt.
Sewing The Skirt
Transforming pants into a skirt can be a fun project. This section covers how to sew your new skirt. Let’s dive into the steps!
Pinning The Fabric
First, lay your pants flat on a table. Cut along the inner seams to separate the legs. Align the two legs to form the skirt shape. Use straight pins to hold the fabric in place. Ensure the fabric lies flat and smooth. This step is crucial for a neat finish.
| Step | Action |
|---|---|
| 1 | Lay pants flat |
| 2 | Cut inner seams |
| 3 | Align legs |
| 4 | Pin fabric |
Stitching The Seams
Next, use a sewing machine to stitch the pinned edges. Start from the top and work downwards. Use a straight stitch for a strong seam. Double-check your stitches to ensure they are even. For added strength, use a zigzag stitch on the raw edges. This prevents fraying and gives a clean finish.
Consider using the following steps:
- Set up your sewing machine
- Stitch from top to bottom
- Use a straight stitch
- Check stitches are even
- Finish with a zigzag stitch
Finally, try on your skirt to ensure it fits well. Make any necessary adjustments. Now, you have a stylish new skirt made from old pants!
Adding A Waistband
Transforming pants into a skirt involves several steps, but one of the most crucial parts is adding a waistband. A well-fitted waistband ensures your new skirt sits comfortably and looks professional.
Measuring For Fit
First, you need to measure your waist. Use a flexible measuring tape.
- Wrap the tape around your waist where you want the skirt to sit.
- Make sure it’s snug but not too tight.
- Take note of the measurement in inches or centimeters.
Next, measure the width of the pants where you’ll attach the waistband. Compare it with your waist measurement.
| Measurement | Description |
|---|---|
| Waist | Measure where you want the skirt to sit |
| Pants Width | Measure the top of the pants |
Attaching The Band
Cut a strip of fabric for the waistband. It should be your waist measurement plus two inches for seam allowance.
- Fold the strip in half lengthwise with the right sides facing out.
- Press it with an iron to create a clean fold.
- Pin the waistband to the top of the skirt, aligning the raw edges.
- Sew the waistband to the skirt using a straight stitch.
Ensure you sew slowly and evenly. This will help the waistband attach neatly.
Once attached, fold the waistband up and press it flat. This gives a polished look.
Finally, top-stitch around the top of the waistband. This will secure it in place and add a finished touch.
With these steps, your waistband should fit perfectly and look professional.
Finishing Touches
Transforming pants into a skirt is just the beginning. The final steps are crucial to ensure your new garment looks polished and professional. This section guides you through the essential finishing touches.
Hemming The Skirt
Hemming gives your skirt a clean finish. Start by folding the raw edge up by half an inch. Press the fold with an iron for a crisp line. Fold the edge up again by another half inch. Press again to secure the fold.
Use straight pins to hold the hem in place. Sew along the edge with a matching thread. Ensure your stitches are even and straight. Remove the pins as you go.
For a professional touch, consider using a blind hem stitch. This will hide the stitches and give a seamless look. Always press the hem again after sewing to set it in place.
Adding Decorative Elements
Decorative elements can make your skirt unique. Consider adding lace trim along the hemline. Attach it by sewing or using fabric glue.
Embroidery is another way to personalize your skirt. Choose a simple design and stitch it onto the fabric. Pockets can also be added for functionality and style. Cut fabric squares and sew them onto the skirt.
Buttons and patches are fun additions. Sew them onto the skirt for extra flair. Remember, less is more. Balance the decorations to avoid an overcrowded look.
| Decoration | Method |
|---|---|
| Lace Trim | Sew or Fabric Glue |
| Embroidery | Hand Stitch |
| Pockets | Sew |
| Buttons | Sew |
| Patches | Sew |
Finish your skirt with a final press. This sets all the stitches and decorations. Enjoy your new, stylish skirt!
Troubleshooting Common Issues
Transforming pants into a skirt can be fun. But, sometimes you face problems. Here, we help you fix these common issues.
Fixing Uneven Seams
Uneven seams can ruin your skirt. Don’t worry, it’s easy to fix.
- Check your measurements: Make sure both sides are even.
- Use pins: Pin the fabric before sewing.
- Re-sew: If seams are still uneven, redo them.
Always use a ruler or measuring tape. It helps in making straight seams.
Adjusting The Fit
A good fit makes your skirt look great. Here’s how to adjust it:
- Try it on: Wear the skirt to see the fit.
- Mark areas: Use chalk to mark tight or loose spots.
- Alter: Sew or cut fabric to adjust the fit.
You can use elastic bands for a better fit. Sew them inside the waistband.
Always check the fit before final sewing. This saves time and effort.
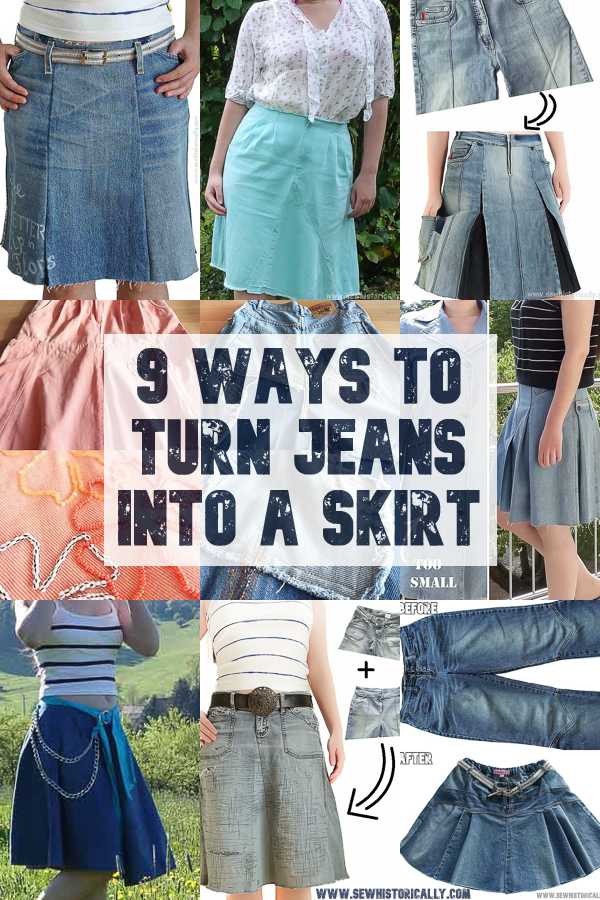
Credit: www.sewhistorically.com
Styling Your New Skirt
Sewing your old pants into a new skirt can be fun. But knowing how to style your new skirt makes it even better. Let’s explore some tips on how to make your new skirt look amazing.
Choosing Tops And Accessories
Picking the right top can change your whole look. A fitted blouse works for a polished style. For a casual look, try a simple t-shirt. Here are some ideas:
- Fitted Blouse: Great for a professional or formal look.
- T-Shirt: Perfect for a relaxed, everyday style.
- Sweater: Warm and cozy for colder days.
Accessories can also make a big difference. A belt can add shape to your outfit. Scarves and hats can add a touch of flair. Here are some accessories to consider:
| Accessory | Purpose |
|---|---|
| Belt | Defines your waist |
| Scarf | Adds color and texture |
| Hat | Completes your look |
Seasonal Styling Tips
Your new skirt can be styled for any season. Here are some tips for each season:
- Spring: Pair with light fabrics and floral prints.
- Summer: Opt for tank tops and sandals.
- Fall: Choose earthy tones and light sweaters.
- Winter: Wear with tights and boots for warmth.
Experiment with different combinations to find your favorite look. Enjoy your new skirt and have fun styling it!

Credit: m.youtube.com
Conclusion
Transforming pants into a skirt is a fun and sustainable project. It allows you to recycle old clothing. Follow the steps carefully for a stylish new outfit. Enjoy your new skirt and the compliments it brings. Happy sewing!


Leave a Reply