

To make a Hawaiian skirt, gather raffia or fabric strips and tie them around an elastic waistband. Trim to the desired length.
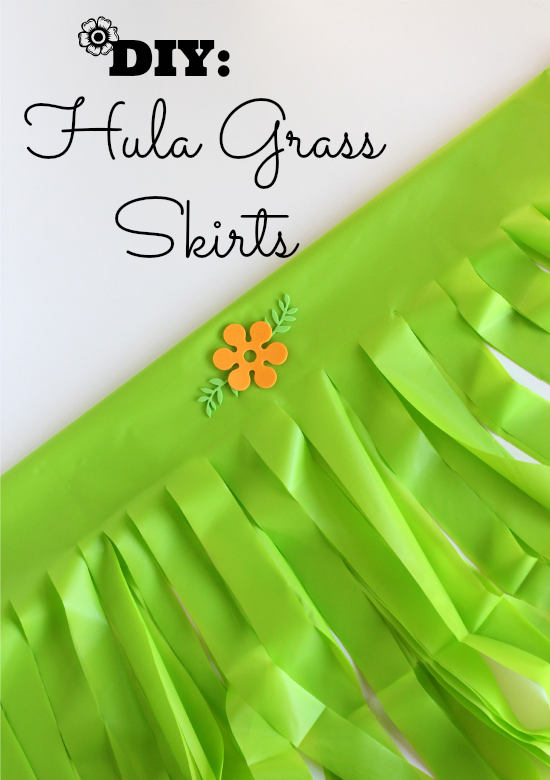
A Hawaiian skirt, also known as a hula skirt, is a fun and festive costume piece often used for luaus or tropical-themed parties. This traditional attire brings a touch of the islands to any event. Creating your own Hawaiian skirt is simple and budget-friendly.
Whether for a party or a performance, crafting this skirt at home can be a rewarding activity. Materials like raffia or fabric strips are easily accessible, making it a convenient project. This guide will help you make a beautiful Hawaiian skirt with ease.
.jpg)
Credit: www.kaleyann.com
Materials Needed
Creating a Hawaiian skirt is a fun and creative project. Before you start, gather all the necessary materials. This ensures a smooth crafting experience.
List Of Supplies
Here’s a handy list of supplies you’ll need for your Hawaiian skirt:
- Fabric (preferably grass or raffia)
- Elastic band
- Scissors
- Measuring tape
- Thread and needle
- Glue (optional)
Choosing The Right Fabric
Selecting the right fabric is crucial. Traditional Hawaiian skirts use grass or raffia. These materials give an authentic look. You can find them in craft stores.
If you prefer a more modern look, use lightweight cotton or polyester. Choose bright, floral patterns to match the Hawaiian theme. Ensure the fabric is comfortable and easy to work with.
Once you have all your materials, you’re ready to start making your Hawaiian skirt. Enjoy the process and have fun!
Measuring And Cutting
Creating a Hawaiian skirt begins with the crucial steps of measuring and cutting. Proper measurements ensure a perfect fit, while precise cutting guarantees a neat finish. Follow these steps to make sure your Hawaiian skirt looks amazing.
Taking Accurate Measurements
Before you cut the fabric, take accurate measurements of your waist and desired skirt length. Use a fabric measuring tape for the best results. Write down these measurements as you will need them for the next steps.
- Waist Measurement: Wrap the tape measure around your waist. Ensure it is snug but not tight.
- Skirt Length: Measure from your waist down to where you want the skirt to end.
Cutting The Fabric
Now that you have your measurements, it is time to cut the fabric. Ensure you have enough fabric to cover your measurements plus extra for seams.
Lay your fabric flat on a large surface. Mark the measurements on the fabric using a fabric chalk or pencil. Ensure your lines are straight and even.
- Cut the Waistband: Cut a strip of fabric for the waistband. It should be 2 inches wide and as long as your waist measurement plus 2 inches for seams.
- Cut the Skirt Fabric: Cut the main piece of fabric for the skirt. It should be as wide as your waist measurement times 1.5 and as long as your desired skirt length plus 2 inches for the hem.
Once you have cut the fabric, you are ready to move on to the next steps. Make sure your cuts are precise and clean.
Creating The Waistband
The waistband is a crucial part of a Hawaiian skirt. It ensures the skirt fits comfortably and stays in place. This guide will help you create a perfect waistband.
Types Of Waistbands
There are several types of waistbands you can use for a Hawaiian skirt:
- Elastic Waistband: Easy to make and offers flexibility.
- Drawstring Waistband: Adjustable and can be tied for the perfect fit.
- Fitted Waistband: Requires precise measurements but looks neat and tidy.
Sewing The Waistband
Follow these simple steps to sew your waistband:
- Measure your waist: Use a tape measure for accurate measurements.
- Cut the fabric: Cut a strip of fabric according to your waist measurement.
- Fold and iron: Fold the fabric strip in half and iron it flat.
- Sew the edges: Sew the long edges together to form a tube.
- Insert elastic or drawstring: Thread elastic or a drawstring through the tube.
For an elastic waistband, ensure the elastic is shorter than your waist measurement for a snug fit. For a drawstring waistband, leave extra fabric for tying the ends.
Here is a quick comparison of the waistband types:
| Type | Pros | Cons |
|---|---|---|
| Elastic | Flexible, Easy to sew | May wear out over time |
| Drawstring | Adjustable, Custom fit | Can be bulky |
| Fitted | Neat, Professional look | Requires precise measurements |
Choose the waistband type that best suits your needs and enjoy making your Hawaiian skirt!
Credit: makeandtakes.com
Assembling The Skirt
Creating a Hawaiian skirt involves several steps. One of the key steps is assembling the skirt. This process includes attaching the waistband and sewing the skirt panels together. Let’s dive into these steps to make your Hawaiian skirt look perfect.
Attaching The Waistband
The waistband is a crucial part of the skirt. It holds the skirt in place and adds a finishing touch. Here’s how to attach it:
- First, measure your waist accurately.
- Cut a piece of elastic band to fit your waist measurement.
- Sew the ends of the elastic band together to form a circle.
- Use a safety pin to thread the elastic through the waistband fabric.
- Ensure the elastic is evenly distributed within the fabric casing.
Tip: Make sure the elastic is not twisted inside the fabric casing.
Sewing The Skirt Panels
Once the waistband is ready, it’s time to sew the skirt panels. The panels form the main body of the skirt.
- Cut the fabric into rectangular panels. The number depends on the desired fullness.
- Hem the bottom of each panel for a clean finish.
- Gather the top edge of each panel using a basting stitch.
- Attach each panel to the waistband by sewing them together.
- Ensure the gathers are evenly spread for a balanced look.
Note: Use a zig-zag stitch to attach the panels for extra strength.
By following these steps, you’ll have a beautiful Hawaiian skirt ready to wear. Enjoy your tropical creation!
Adding Decorative Elements
Once you have your basic Hawaiian skirt, it’s time to make it shine. Adding decorative elements can transform your skirt from simple to stunning. This section will guide you through choosing and attaching decorations.
Choosing Decorations
Decorations can make your skirt unique. Here are some ideas:
- Flowers: Use artificial or real flowers.
- Shells: Small, lightweight shells work best.
- Beads: Choose colorful beads to add sparkle.
- Ribbons: Use ribbons for an extra touch.
Select decorations that match your theme. Bright colors work well for Hawaiian skirts. Ensure decorations are lightweight and easy to attach.
Attaching Decorations
Attaching decorations is simple. Follow these steps:
- Gather materials: You will need thread, needle, glue, and your chosen decorations.
- Plan the layout: Arrange decorations on the skirt first. Make sure they are evenly spaced.
- Sew or glue: Use a needle and thread for a secure hold. For quicker attachment, use strong fabric glue.
- Secure edges: Ensure all edges of the decorations are secured.
For a step-by-step guide, refer to the table below:
| Step | Action |
|---|---|
| 1 | Gather materials |
| 2 | Plan the layout |
| 3 | Sew or glue decorations |
| 4 | Secure edges |
Decorating your Hawaiian skirt can be fun. Use your creativity and make it your own!

Credit: www.pinterest.com
Finishing Touches
After crafting your Hawaiian skirt, it’s time for the finishing touches. These last steps make your skirt look professional and complete. Let’s explore two key areas: hemming the skirt and making the final adjustments.
Hemming The Skirt
Hemming gives your skirt a neat edge. Follow these simple steps:
- Fold the bottom edge of the skirt up by 1 inch.
- Press the fold with an iron to make a crease.
- Fold the edge up again by 1 inch and press.
- Pin the folded edge to hold it in place.
- Sew along the folded edge using a sewing machine or by hand.
This double fold method hides the raw edge and prevents fraying.
Final Adjustments
Check the fit of your skirt. Make sure it’s comfortable.
- Try on the skirt to see if the waistband fits well.
- If it’s too loose, tighten the elastic or drawstring.
- If it’s too tight, you may need to replace the waistband.
Look at the overall length of the skirt. It should be even all around. If needed, trim any uneven edges before hemming.
Decorate your skirt with optional embellishments:
| Embellishment | Description |
|---|---|
| Sequins | Add sparkle to your skirt. |
| Fabric Paint | Create custom designs. |
| Beads | Sew beads along the hem for extra flair. |
These finishing touches will make your Hawaiian skirt truly unique and beautiful.
Styling Tips
Crafting a Hawaiian skirt is just the beginning. Styling it can be just as fun. Whether you are preparing for a luau or a beach party, the right accessories and outfit combinations can enhance your look. Let’s explore some exciting ways to style your Hawaiian skirt.
Accessorizing The Skirt
Accessories can transform your Hawaiian skirt from simple to stunning. Here are some ideas to consider:
- Flower Leis: Add vibrant flower leis to your neck or hair.
- Shell Necklaces: Wear shell necklaces for a beachy vibe.
- Bracelets: Stack colorful bracelets on your wrists.
- Anklets: Add anklets to complete your tropical look.
Pairing With Outfits
Pairing your Hawaiian skirt with the right top is crucial. Here are some outfit ideas:
- Crop Tops: Pair with a simple crop top for a casual look.
- Bikini Tops: Perfect for a beach party setting.
- Tank Tops: Choose a tank top in a matching color.
- Off-Shoulder Tops: Add a touch of elegance with an off-shoulder top.
| Accessory | Recommended Top |
|---|---|
| Flower Lei | Off-Shoulder Top |
| Shell Necklace | Bikini Top |
| Bracelets | Crop Top |
| Anklets | Tank Top |
Care Instructions
Taking care of your Hawaiian skirt ensures it stays beautiful. Follow these simple steps to maintain its vibrant colors and soft fabric.
Cleaning The Skirt
Proper cleaning is crucial to keep your skirt looking fresh. Here are some easy tips:
- Hand wash the skirt in cold water.
- Use mild detergent to protect the fabric.
- Avoid wringing the skirt to prevent damage.
- Rinse thoroughly to remove soap residue.
- Air dry the skirt by laying it flat.
Storing Tips
Correct storage helps maintain the skirt’s shape and color. Follow these guidelines:
- Fold the skirt neatly to avoid wrinkles.
- Store in a cool, dry place away from sunlight.
- Use a garment bag for extra protection.
- Avoid placing heavy items on top of the skirt.
- Check for any damage before storing it away.
Conclusion
Crafting a Hawaiian skirt is a fun and rewarding experience. You’ll enjoy the vibrant colors and unique design. Follow the steps, and you’ll have an authentic skirt in no time. Share your creation with friends and family. Dive into this creative project and embrace the Hawaiian spirit today!


Leave a Reply