
To sew a handkerchief skirt, cut a large square of fabric and create an opening in the center for the waist. Hem the edges and add an elastic waistband.
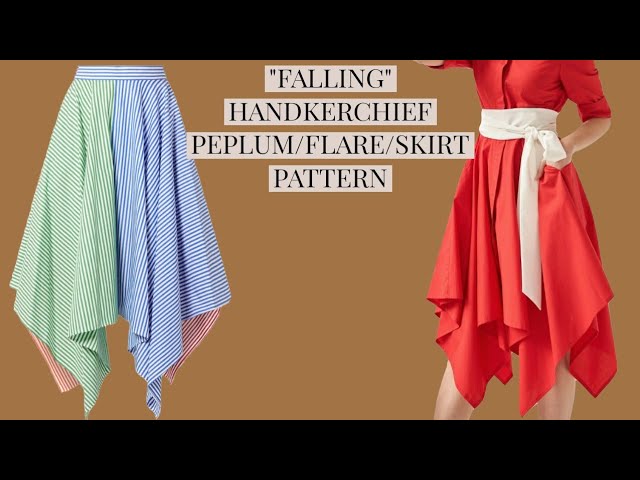
A handkerchief skirt is a stylish and versatile addition to any wardrobe. Its unique design features asymmetrical, flowing edges that create a flattering silhouette. This type of skirt is perfect for various occasions, from casual outings to more formal events.
Sewing a handkerchief skirt is a straightforward project, even for beginners. By following a few simple steps, you can create a custom skirt that fits your personal style. Choose a fabric that drapes well, such as lightweight cotton or silk, for the best results. With some basic sewing skills, you can craft a beautiful handkerchief skirt in no time.

Credit: mylittlesewingspace.wordpress.com
Introduction To Handkerchief Skirts
Handkerchief skirts are a fun and stylish addition to any wardrobe. They are characterized by their unique, flowing design that resembles a handkerchief. These skirts offer a whimsical and elegant look that can be dressed up or down.
What Is A Handkerchief Skirt?
A handkerchief skirt features an uneven hemline. The hemline creates a series of points or corners. This design gives the skirt its distinctive, flowing appearance. The fabric drapes beautifully, creating a fluid movement when you walk. These skirts can be made from various materials, such as cotton, silk, or chiffon.
| Feature | Description |
|---|---|
| Hemline | Uneven, with multiple points |
| Material | Cotton, Silk, Chiffon |
| Design | Flowing and whimsical |
Popular Styles And Trends
Handkerchief skirts come in many styles and trends. Each style offers a unique look. Some popular styles include:
- Bohemian: Often made with light, airy fabrics and floral patterns.
- Formal: Use luxurious fabrics like silk or satin for a more elegant look.
- Casual: Made from cotton or jersey for everyday wear.
These skirts are versatile and can be paired with various tops. They work well with crop tops, blouses, or even simple t-shirts. The key is to balance the skirt’s flowing nature with a more fitted top.
Trends also play a role in how these skirts are styled. Currently, layering is popular. People often pair handkerchief skirts with leggings or tights. Another trend is mixing patterns. A floral handkerchief skirt with a striped top creates a bold look.
Overall, handkerchief skirts are a stylish choice for any occasion. They offer a mix of elegance and fun that is hard to beat.
Materials And Tools Needed
Starting a new sewing project can be exciting. To create a beautiful handkerchief skirt, you need the right materials and tools. This section will guide you through the essentials.
Fabric Selection
Choosing the right fabric is important. The fabric determines the skirt’s look and feel. Here are some fabric suggestions:
- Cotton: Easy to sew and comfortable to wear.
- Chiffon: Lightweight and flows beautifully.
- Silk: Luxurious and elegant but harder to work with.
Opt for a fabric that matches your style and skill level. Ensure the fabric is wide enough for your skirt pattern.
Essential Sewing Tools
You need several tools to sew a handkerchief skirt. Below is a list of essential sewing tools:
- Sewing Machine: Speeds up the process and ensures neat stitches.
- Scissors: Sharp fabric scissors for clean cuts.
- Measuring Tape: For accurate measurements.
- Pins: To hold fabric pieces together.
- Thread: Matching thread for sewing.
- Iron: For pressing seams and hems.
These tools make the sewing process easier and more efficient.
| Tool | Purpose |
|---|---|
| Sewing Machine | Makes sewing faster and stitches neater |
| Scissors | Cuts fabric accurately |
| Measuring Tape | Measures fabric pieces |
| Pins | Holds fabric in place |
| Thread | Used for sewing |
| Iron | Presses seams and hems |
Having these materials and tools ready will make your sewing project smoother. Gather everything before you start sewing your handkerchief skirt.
Preparing The Fabric
Before you start sewing a handkerchief skirt, you need to prepare the fabric. This step is crucial for achieving a professional and neat look. Proper preparation ensures that your skirt will fit well and look stunning.
Measuring And Cutting
First, gather your materials. You will need fabric, scissors, and a measuring tape. Choose a lightweight fabric for a flowy handkerchief skirt.
- Spread the fabric on a flat surface.
- Use the measuring tape to measure your waist.
- Double this measurement to determine the fabric width.
- Mark the fabric with chalk or fabric marker.
- Cut the fabric into a square shape.
Ensure the cuts are straight. This will help in achieving a neat finish.
Marking The Hemlines
Marking the hemlines is the next step. It helps to sew straight lines.
- Lay the fabric flat again.
- Measure 1 inch from the edge for the hemline.
- Use a ruler to draw a straight line.
- Repeat this for all four edges.
Check that all markings are visible. If not, darken them with your marker.
Creating The Pattern
Creating the pattern is the first step in sewing a handkerchief skirt. This step sets the foundation for your project. Follow these steps to design and customize your skirt pattern.
Basic Pattern Design
Designing the basic pattern is simple and fun. You only need a few materials:
- Pattern paper or old newspaper
- Ruler
- Pencil
- Scissors
Start by drawing a large square on your pattern paper. The size of the square depends on your desired skirt length. Follow these steps:
- Measure your waist circumference.
- Divide this number by four.
- Add 2 inches for seam allowances.
- Draw a square with each side equal to this measurement.
Next, cut out the square. This is your basic handkerchief skirt pattern.
Customizing The Pattern
Customizing the pattern adds a personal touch to your skirt. You can change the shape and size of the skirt.
For a fuller skirt, use a larger square. For a shorter skirt, use a smaller square. Here are some customization ideas:
- Asymmetrical Hem: Cut the square at an angle.
- Layered Look: Create multiple squares in different sizes.
- Ruffled Edges: Add extra fabric to the edges.
Experiment with different designs to find your favorite look.
Sewing The Skirt Panels
Creating a handkerchief skirt involves several key steps. Sewing the skirt panels is a crucial stage. Each panel must be stitched and joined accurately. This ensures the skirt flows beautifully. Follow these steps to sew your skirt panels perfectly.
Stitching Techniques
Before starting, choose the right stitching techniques. This helps in achieving neat and durable seams. A straight stitch is ideal for most fabrics. For stretchy fabrics, use a zigzag stitch. Here’s a quick guide:
| Fabric Type | Recommended Stitch |
|---|---|
| Cotton | Straight Stitch |
| Jersey | Zigzag Stitch |
| Silk | French Seam |
Joining The Panels
After stitching, the next step is joining the panels. Lay your panels flat. Ensure the right sides are facing each other. Pin the edges to secure the fabric. This prevents shifting during sewing. Follow these steps:
- Pin the panels together.
- Use a straight stitch along the pinned edges.
- Press the seams open with an iron.
- Finish the raw edges with a zigzag stitch.
Properly joined panels ensure the skirt drapes well. This step is crucial for a professional finish. Take your time and make sure each seam is precise. Your handkerchief skirt will look amazing!
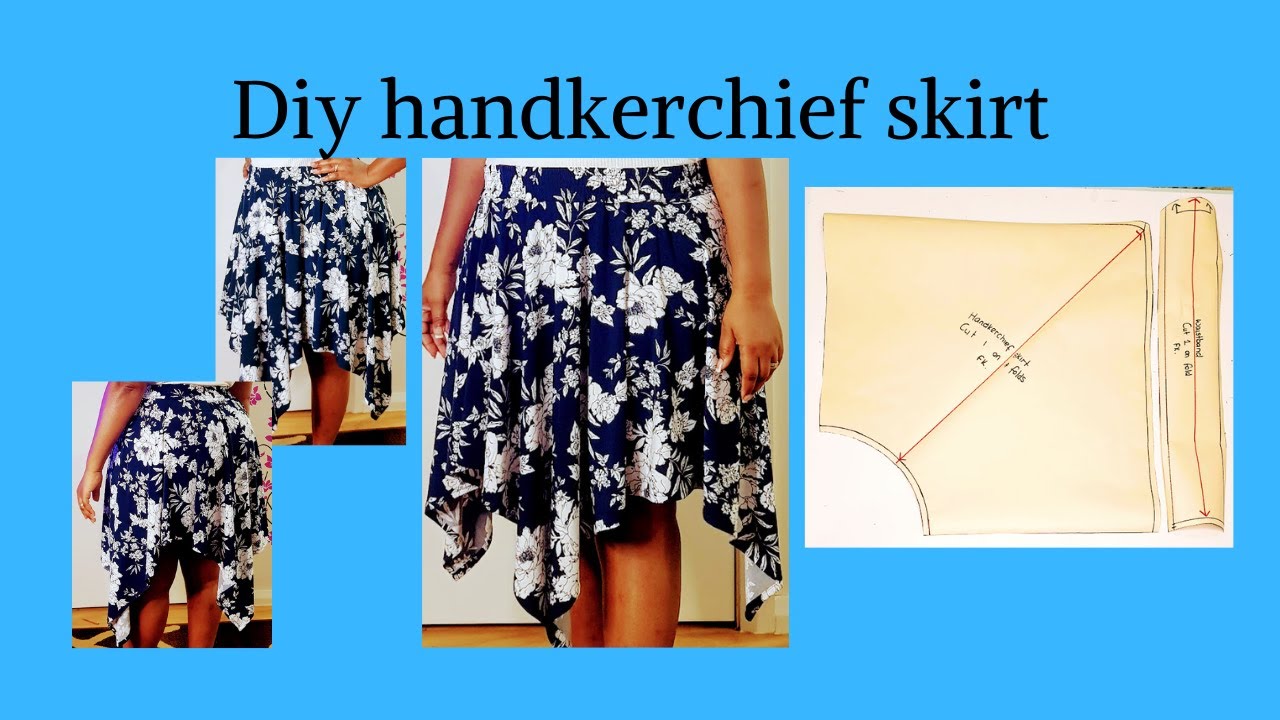
Credit: www.youtube.com
Finishing The Hem
Finishing the hem of your handkerchief skirt is crucial. This step ensures a polished and professional look. There are several methods to hem your skirt. You can also add decorative edges for a unique touch.
Hemming Methods
Choose a hemming method that suits your fabric and style.
- Double Fold Hem: Fold the fabric edge twice. This method hides raw edges and creates a neat finish.
- Zigzag Stitch: Use a zigzag stitch along the edge. This prevents fraying and adds a decorative touch.
- Rolled Hem: A rolled hem works well for lightweight fabrics. It creates a narrow, elegant finish.
Adding Decorative Edges
Enhance your skirt’s appearance with decorative edges. These simple additions make a big impact.
- Lace Trim: Sew lace trim along the hem for a delicate look.
- Piping: Add piping for a pop of color. This creates a bold, defined edge.
- Ric-Rac: Use ric-rac for a fun, wavy finish. It’s great for a playful skirt.
Here’s a quick table to summarize the methods and their benefits:
| Hemming Method | Best For | Benefits |
|---|---|---|
| Double Fold Hem | All Fabrics | Neat, Durable Finish |
| Zigzag Stitch | Light to Medium Fabrics | Prevents Fraying, Adds Texture |
| Rolled Hem | Lightweight Fabrics | Elegant, Narrow Finish |
Adding A Waistband
Adding a waistband to your handkerchief skirt is a crucial step. It ensures a perfect fit and adds a professional touch. This section will guide you through the process seamlessly.
Types Of Waistbands
There are different types of waistbands you can add to your skirt. Here are some common options:
| Type | Description |
|---|---|
| Elastic Waistband | Easy to make and comfortable to wear. |
| Fitted Waistband | Provides a tailored look and requires precise measurements. |
| Drawstring Waistband | Adjustable and casual, perfect for a relaxed fit. |
Attaching The Waistband
Follow these simple steps to attach your chosen waistband:
- Prepare the Fabric: Cut a strip of fabric for the waistband.
- Measure and Pin: Measure your waist and pin the fabric accordingly.
- Sew the Waistband: Use a sewing machine or hand stitch. Ensure the stitches are secure.
- Finish the Edges: Hem the edges to prevent fraying.
By following these steps, you can add a professional waistband to your handkerchief skirt. This will ensure it fits perfectly and looks great.
Final Touches
The final touches are crucial in making your handkerchief skirt look professional. These steps ensure your skirt is polished and ready to wear.
Ironing And Pressing
Ironing and pressing give your skirt a neat finish. Start by setting your iron to the appropriate temperature for your fabric. Use a pressing cloth to avoid burning delicate materials. Gently press all seams and hems. This step removes any wrinkles and helps the fabric lay flat.
Press the waistband to give it a crisp look. Ensure all pleats and folds are pressed evenly. This attention to detail makes a big difference in the skirt’s overall appearance.
Quality Checks
Perform quality checks to make sure your skirt is perfect. Look for any loose threads or uneven hems. Use small, sharp scissors to trim any excess threads.
Check all seams for strength. Ensure there are no gaps or weak spots. If needed, reinforce any areas by sewing over them again.
Finally, try on the skirt. Make sure it fits well and looks good from all angles. Adjust if necessary.
| Final Touch | Description |
|---|---|
| Ironing and Pressing | Press all seams, hems, and waistband evenly. |
| Quality Checks | Trim loose threads, check seams, and ensure proper fit. |
These final touches are essential. They ensure your handkerchief skirt looks its best. Follow these steps carefully for a professional finish.
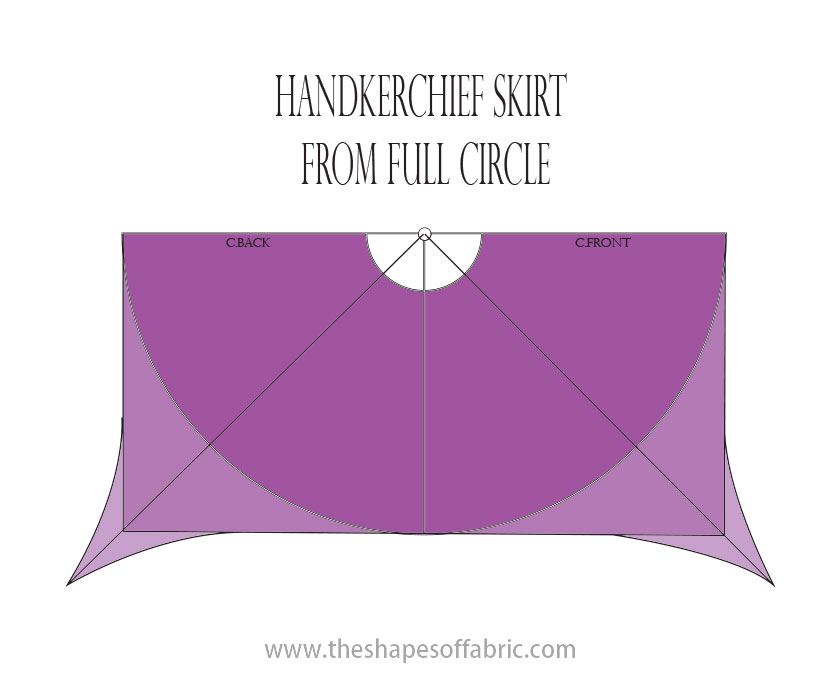
Credit: www.theshapesoffabric.com
Conclusion
Creating a handkerchief skirt is simple and fun. Follow these steps, and you’ll have a stylish skirt. Practice makes perfect, so don’t hesitate to try different fabrics. Soon, you’ll master this sewing project and impress others with your skills. Enjoy your new handkerchief skirt and the compliments that come with it!


Leave a Reply